I am so excited about this guest post Ayana over from her blog AyanaREd. She has lots of great stuff, so be sure to check her out.
A friend of mine taught me how to knit last year, and it was highly addicting and fun for about a week, then I got pissed off from all my mistakes, packed it away and never touched it again.
I hear crocheting is supposed to be easier. I wanted to learn how and see if that is true. Ayana just happens to be a crocheting expert and she is going to help me learn. This will be a series of guest posts that builds on one another, did I mention I am excited?!
So here is Miss Ayana...and best of all her tutorial is a video!! I told her that I am bit dyslexic when it comes to directions and that I am visual learner, and so she whipped up this video for me. Thanks so much Ayana!
The Chain Stitch, so simple.
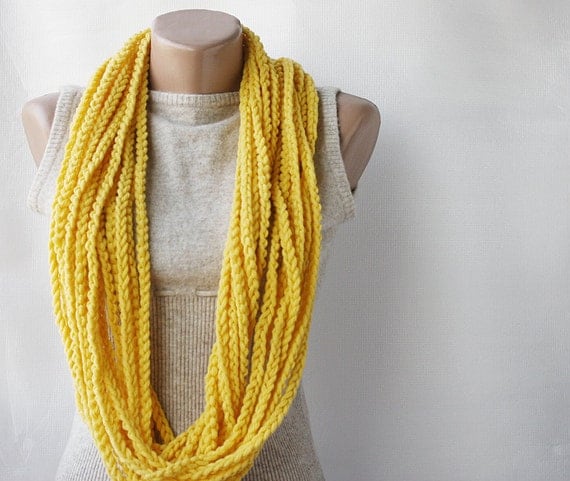
I saw this scarf, this scarf, and this scarf on Etsy and I thought they were super cute. (What? You don't look on Etsy for some DIY inspiration, too?).
Anyway, what struck me about these scarves was the fact that they were nothing but a bunch of CHAINS! Yes. The super, simplest crochet stitch of them all... I don't even know if it is considered a stitch.
Generally, it is used as a foundation. Most all crochet projects start out with some chains. If you see it in a pattern it will be abbreviated to just ch. For example if you see ch 8, this means that you should make 8 chains.
Let me show you how to do it:
Easy, huh? Let me know if you have any questions!
Thanks again, Ayana. I am so excited for the rest of this series and to learn how to make that beautiful scarf!
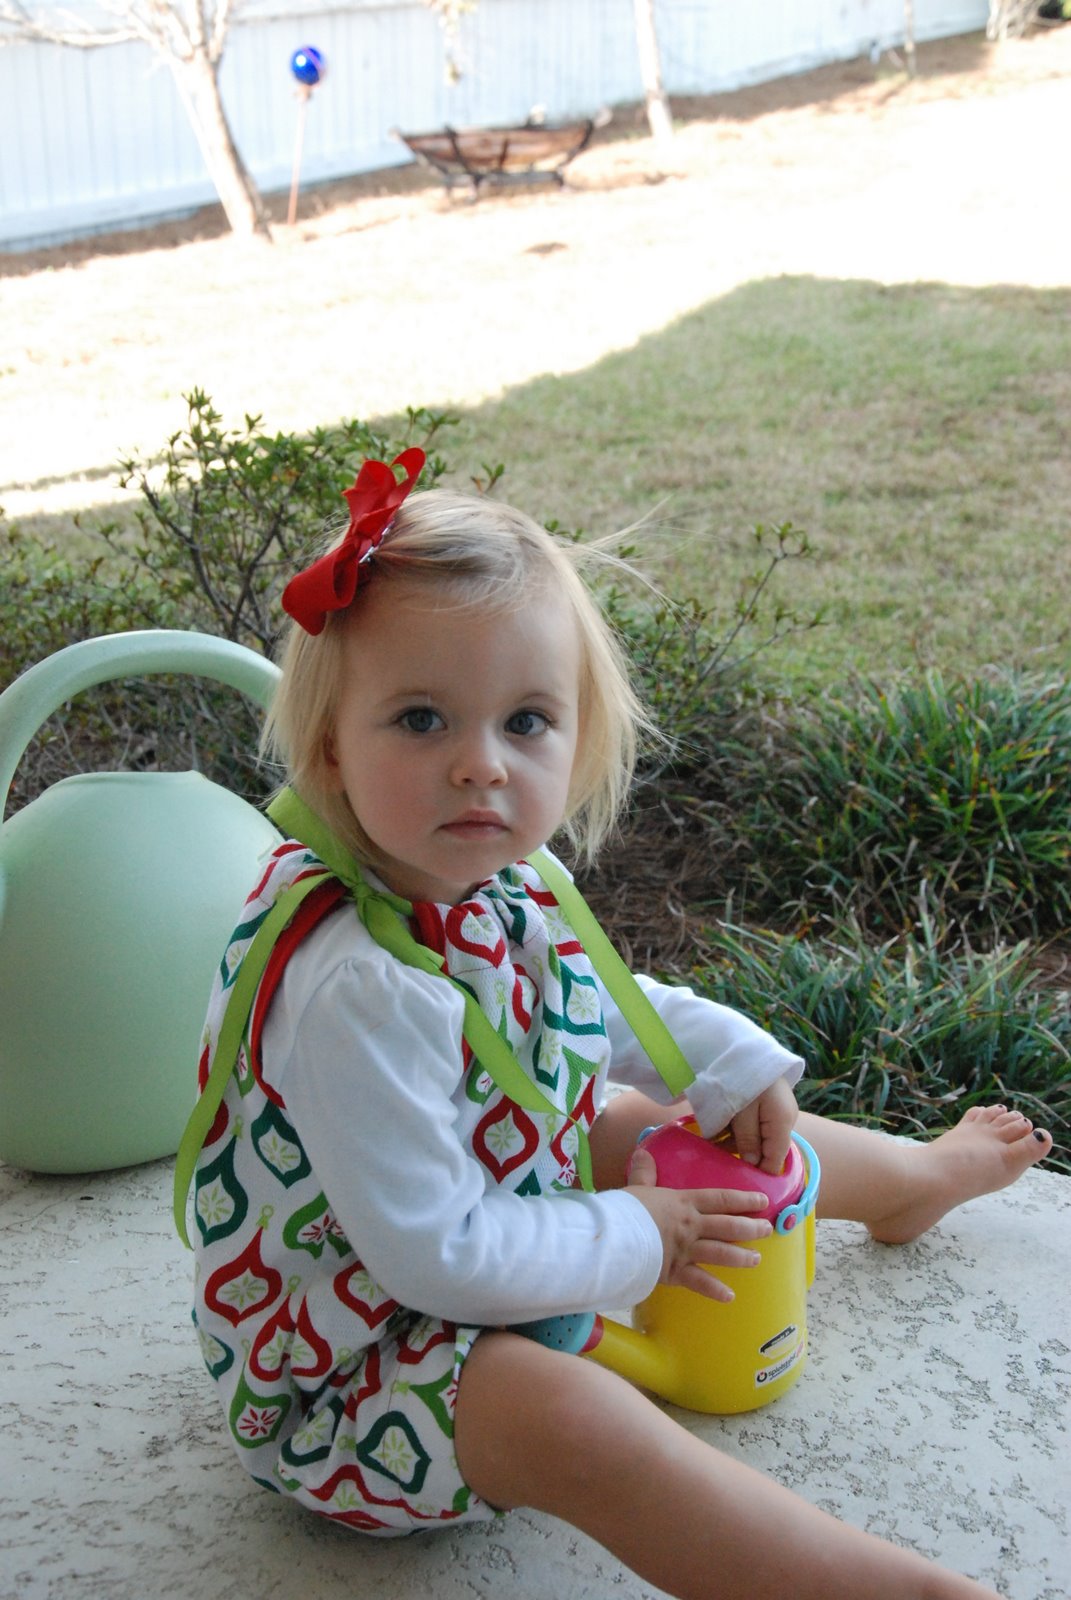
Yup, I made my daughter I dress out of dishtowels.
It is one of those things that could go very wrong or very right. I wasn't convinced it was right, until she tried it on and then I felt pretty damn good. But Penelope would look cute in a potato sack, so I am not sure if I am seeing clearly.
I have seendishtowel skirt tutorialsonline and that is what planted the seed for the idea in the first place. Apparently, people are making other types of children's clothing with dishtowels. I am not sure about this, but mad props to this mom for being creative.
In my mind a dishtowel is thicker and a tea towel is thinner. This dress would probably be easier to sew with a thinner tea towel, but I liked that the dish towel was thicker, because it would give her added warmth this month. Not that we need it, the high was 80 yesterday!
Miss P was not really in the mood to be photographed this day. She just wanted to play, can't really blame her.
I originally planned to make her a Christmas dress with some amazing, vintage inspired Christmas fabric I found, but after I paid for it, I got an email saying they were sold out.
I needed to come up with plan B and I did not want to go into Joanne's and wait in line for an hour, so I decided to tempt fate and experiment with the dish towels!
I got the towels at Target, the day after Christmas last year, and got them 50% off. They came in a bundle of two, and with the sale cost $2. I used one for the front and one for the back. I had the ribbon and bias tape on hand from another project.
I think the pattern design of the towel is what is going to make or break a sewing project with a dish towel. It has really got to be super cute. I love this modern Christmas design, I think it makes the dress pop.
You sew the towels together, along the long sides, right sides facing. This gives you a tube of dish towel. Then you cut out your arm holes, sew the bias tape on, and make a regular pillow case dress like here and here.
I also made this little cutie, inspired from where else, Pinterest. I wanted to make a shirt that could be worn with her red and green skirt that Penelope wore forher birthday. You did see the Apple Party pictures, right?!
So what do you think? Is the dish towel, pillow case dress, a right or a wrong?
I was so excited when the cooler weather arrived because Penelope and I love to wear scarves. Last year she wore a scarf of some kind, pretty much every day.
As I started pulling out her scarves, I noticed a couple of things. The original one I made, was a regular, long rectangular scarf. It was from an old American Apparel scarf of mine, that I cut in half and gave to her. But this regular scarf did not stay on well, while out playing, only her No Sew Baby Cowlsdid.
But when I looked at those, I realized that with just a little bit more effort I could make a better one. I still love these cowls, and if you don't have a sewing machine or much time, MAKE THOSE, it is far more important for your kid to being wear a scarf than to be wearing a perfect one. They are ridiculously easy-just cut off the bottom of an old t-shirt/dress and bam, you have a scarf.
But if you have a sewing machine, some basic skills and a few minutes, try it this way for an updated, and little bit more refined look.
And making this version of an infinity scarves, with fabric rather than a t-shirt, gives you much more options with colors.
I also didn't like how all her No Sew Baby Cowls were different widths and lengths, some looked better on her than others because of that. So I picked the one that fit her body best and measured it to create the new version.
The first thing I did was sew the ends together, of that very first scarf she ever wore, and turned it into an infinity scarf. Less than 30 seconds, and DONE! Just sew the ends together and cut off any excess fabric with pinking shears. Then place your stitching in the back when you put on the scarf.
To make this type of scarf with fabric, cut one piece 40x10. Then sew the short ends together to make a loop. Pick a type of fabric that does not fray like a jersey or a flannel. And you are done!
I also wanted to make a fuller, warmer version as well.
I cut two rectangular pieces of red chenille, 40x10.
Then sewed them together, right sides facing, along the long side.
Then I turned it inside out, and that gave me a long tube. Then I sewed the ends together, to make the scarf.
There a couple of ways to do this, I choose to do a French seam to give the scarf a finished look, but I am still a pretty basic sewer, and I am sure there is a million other ways to do it. Here is another great Infinity Scarf (for a Mama) tutorial.
And that is it. The whole project will take about 15 minutes, from cutting to sewing.
Now, go make your little one a scarf and keep the flu and colds away this winter season!!
I have burlap on my mind lately. A friend of mine made a ridiculously cute Halloween pillow and then I started thinking that burlap over a white table cloth would be really cute for Penelope's Apple themed 2nd birthday party.
And then I thought how could would it be to do a burlap headboard for our master bedroom.
Here is my full Burlap Beautiful board. Have you made any burlap projects lately?
Before I met my husband, I was the kind of girl that would paint wood furniture all the time. In college, almost every piece of furniture in my house was painted. I don't know what it is, maybe I watched way too much HGTV my senior year of high school, but I just love the look.
Peter is the kind of guy who is snooty about painted furniture. He makes turned wood pieces of art and builds furniture from scratch and thinks that the wood is sacred and should not be covered.
Which I get and with beautiful wood, I understand, but not all wood is the same. And plus, I feel the itch to paint some furniture coming on!!
We are in need of a head board in our master bedroom, since we put our bed in the guest bedroom, when we moved our mattress to the floor tomake co-sleeping with Penelope safe.
I saw this and fell in love. Not sure where the heck I can get a used door cheap, but sure it is cool.
This is not furniture, but I really, really want to do this to my garden. Maybe later this winter, when it is all dreary outside.
This is why painting furniture is so great. You turn some piece of crap thing, into awesomeness for just a few bucks! You can see all my pins here.
Do you like to paint furniture? Or are you a purist like my husband?
Like I mentioned in this post, I had some left over chalkboard paint from when I did Penelope's playroom makeover. And now I wander around my house, mentally referring to my chalkboard pin board on Pinterest, trying to find things I can paint with chalkboard paint.
One Fall, several years ago, I thought it would be a great idea to buy 5 million clay pots and put mums inside and line them up and down my front steps. It was beautiful, but not very practical. Ever since, I have had mountains of these clay pots in my garage, just waiting for the perfect DIY to come along.
I had been meaning to rearrange and re pot some of my orchids and replenishe their soil with some orchid fertilizer. I slapped some chalk board paint on the pots first before I replanted. I painted two coats.
Then I wrote Boo in white chalk. I love how it came out! So stinking cute and best of all, EASY.
I have seen all kinds of footprint artwork on Pinterest, but I haven't seen this till my friend did it. She made hers out of felt and put it on a felt, trick or trick bag she made for her daughter. I was going to do this painted version, but my other friend beat me to it. She watched Penelope for me the other day and they did this craft together.
I think this would look super cute in a black frame with a white background. It would be cute to do this every year and make it a tradition.
And lastly, another super easy, toddler craft that doubles as a Fall decoration. Again, this is not my idea but one of my friends. Penelope had so much fun doing this, she says Paint Pumpkin!, several times a day. It is just plain old acrylic paint and let your little one go to town.
Oh and P.S. remember this post with my Candy Corn pins? Yeah, well, I was right, I ended up eating the entire glass jar of candy corns. I actually pulled it off the counter and sat down with the damn thing on my lap and watched a movie. No more decorating with candy corn for me.
I searched and searched online and could not really find a great bean bag tutorial. The best I could find was this, and it helped me understand the concept of making a spherical shape, but I still didn't really like it.
So as usual, I just winged it and did whatever the hell I wanted to do, in the moment. And it all turned out good enough for me!
As long as you don't look at the seams too close, they are super cute. I figured they are going to get lots of wear and tear, so it didn't really matter if they are perfect.
Penelope loves them and that is the most important thing. She loves to go in there and play with her little Calico Critter dolls. I bought them on a whim, even though the box says 3 and up and has a million tiny pieces, and I am so glad I did. These are probably her most played with toy right now. She will sit for a long time and pretend all sorts of little scenarios, it is great.
They do require a lot of fabric, especially if you go the traditional bean bag/pouf route. But I used sheets that I got a garage sale, and spent only a couple of dollars. The one on the right is an old Ralph Lauren sheet and the one on the right is an old Pottery Barn duvet.
I bought this bean bag chair insert, from The Company Store. In the video link above, they used cut up foam mattresses as filing.
Then I cut out my pieces. If you go the traditional route, you need six pieces like this. As long and wide as you need them. I made a huge mistake and forgot to leave the bottom of the panel wider than the top.
Then cut your two circles in the diameter that you need. The wider at the bottom panel, is to be attached to the bigger circle, the smaller top, to the smaller circle.
This is the point I realized I had f-ed it up. I did not make my panels wide enough, so it wouldn't fit. So I had to switch to plan B. I ended up opening up the bean bag, even though the tag, explicitly says DO NOT OPEN. Like I said, I tend to do whatever the hell I want and so I opened it up.
Inside was small pieces of popcorn packaging. So basically, I made a huge mess. It vacuumed up super easy though.
After I made the first one. I thought, Good God, there has got to be an easier way. Then a little later, I was sitting on my couch with Penelope, looking at my dog's bed. His bed, is basically a big round pillow with a panel between the top and bottom to give it some height. So then I thought, what if I just did a big round pillow with no panel??
It took two seconds to make one this way! It looks almost the same and took about 80% less time!
The one on the right, is with the panels, the one on the left is just a big round pillow. All you do is cut two circles, any size you want (I used my round coffee table as a cutting template) and place them right sides facing. Then sew all around it, but leave a large opening to stuff it, then turn it inside out and stuff and sew closed.
I closed with a hand it stich and then went back over it with the machine to reinforce it.
Pretty cute right? And a million times easier than a regular bean bag, right? Have you ever made one?
I had so much fun doing this project. It was time consuming, because I had to do several layers for each canvas. But like the ABC wall art, I did it a little bit a time and went slowly, doing a bit when I could. I found this is the best way to do projects in my post-baby life.
Leave it all out and work on it when you can. But of course, if you go this route, you have to be ok with a little bit of mess for awhile. Which is hard for me, because I like a tidy house, with everything in its place.
My original inspiration came from the photo below. You can see my full board here. I loved this picture so much and wanted to do something as big as the picture. But there was so much going on in Penelope's new playroom that I need to scale it down to make it work. And to make it more cost effective. Big canvases like that are expensive!
I used plan old acrylic paint. I had about half the bottles and bought the other half. These bottles can be kind of expensive, almost $3 a bottle, but you will use them for a long time.
If I had bought all the bottles, I probably would have used different paint colors, but I am still pretty pleased with the color palate.
These mini canvases came in a pack of three. So I bought 5 packs for a total of 15. A friend of mine had the great idea, of using felt instead!
Once they were all painted and dried, I had fun rearranging them on the floor to figure out what configuration I liked best.
Almost there!
Finally, the final configuration!
Then I put them up on the wall with velcro. I put them right over her art table. So she likes to get up on her table and then pull them down. Which honestly, makes my skin crawl, because its just one more thing to clean up. But it is so beautiful to look at it, and we use it as a learning tool to learn her colors, that it is so worth it!