Wednesday, October 12, 2011

Cultured Fruit Leathers

When I saw this recipe, I knew I had to try it.  And of course, whenever I see I recipe, I like to figure out how to make it easier and more simplified, without loosing flavor.


I wanted to make the recipe, very similar to how I make Penelope's smoothies so she would be more likely to like them. So I omitted the salt, spices and sweetener.  My recipe is simply fruit and whey. 


I thawed mangoes, blueberries and raspberries for several hours and then dumped them in my blender.  I am not sure if my blender doesn't work well, or it is just a piece of shit, in general, but I have to thaw my fruit till they are basically mush, before it will blend it up.

Then I added some whey.  To learn how to make whey, check out this post.  It is really, really easy and you also get cream cheese when you do it!  

I used three tablespoons of whey, no real reason, just felt like it needed three instead of two.

Then I blended it up well to spread the whey through out the entire batch and put the fruit puree in another mason jar.


I put a lid on it, and put it on my counter to ferment for three days.  


Now, are you wondering why in the hell would I want to add whey and ferment it before making the fruit leather?  You can certainly leave this part out if you want.  But if you do this step, it really kicks it up a notch, in how healthy the snack is.  

Your body needs raw enzymes and good bacteria to make your digestive system work properly. And your digestive system is one of the foundations for good health.


So anywhere and anyway I can, I like to eat raw and fermented foods.


Then I spooned the mixture into my dehydrator.  Mine came with flat silicon trays, but if you don't have one, you can use wax paper to keep it from falling through the holes.

Then I turned my dehydrator on and heated it for 24 hours. I put it at a 115 degree temp, if you go much higher than that you will kill the beneficial bacteria/enzymes.

I checked it a couple of times to make sure I didn't over cook it.  Right at about 24 hours it looked like this and I felt like it was done.


Then I sliced it up and peeled it off.  And me and Penelope had a very tasty snack on the porch!

The first link below is the dehydrator I have, the Nesco Food Dehydrator.  When I was researching which one to buy, everything I read online raved about the Excalibur Dehydrator, but it was too expensive.  I am thrilled with my $50 Nesco one.  It is compact and works just fine.


Tuesday, October 11, 2011

Easiest Halloween Decoration Ever

Like I mentioned in this post, I had some left over chalkboard paint from when I did Penelope's playroom makeover.  And now I wander around my house, mentally referring to my chalkboard pin board on Pinterest,  trying to find things I can paint with chalkboard paint. 


One Fall, several years ago, I thought it would be a great idea to buy 5 million clay pots and put mums inside and line them up and down my front steps.  It was beautiful, but not very practical.  Ever since, I have had mountains of these clay pots in my garage, just waiting for the perfect DIY to come along. 

I had been meaning to rearrange and re pot some of my orchids and replenishe their soil with some orchid fertilizer.  I slapped some chalk board paint on the pots first before I replanted.  I painted two coats.


Then I wrote Boo in white chalk.  I love how it came out!  So stinking cute and best of all, EASY.

I have seen all kinds of footprint artwork on Pinterest, but I haven't seen this till my friend did it.  She made hers out of felt and put it on a felt, trick or trick bag she made for her daughter.  I was going to do this painted version, but my other friend beat me to it.  She watched Penelope for me the other day and they did this craft together.  


I think this would look super cute in a black frame with a white background.  It would be cute to do this every year and make it a tradition.
 
And lastly, another super easy, toddler craft that doubles as a Fall decoration.  Again, this is not my idea but one of my friends.  Penelope had so much fun doing this, she says Paint Pumpkin!, several times a day.  It is just plain old acrylic paint and let your little one go to town.


Oh and P.S.  remember this post with my Candy Corn pins?  Yeah, well, I was right,  I ended up eating the entire glass jar of candy corns. I actually pulled it off the counter and sat down with the damn thing on my lap and watched a movie.  No more decorating with candy corn for me.


What is your best and EASY Halloween decoration?


Posted by Picasa

Friday, October 7, 2011

Pinterest Love: Purple Color Story

I have been in purple/lavender mood lately.  I don't know if I am because I have been seeing it out when I shop or I was drawn to it first.  Either way, purple is a color that looks good on me and I love purple as a Fall color.  You can see all my purple pins here.


I wanted to do a purple color story for our family portraits with Robin Adams Photography coming up soon.  I got this dress for Penelope:

If you are Facebook with me, you know that she has some ridiculously cute brown boots that are going to be perfect with this dress.


I am going to wear either a purple dress and brown boots, but that might be too matchy-matchy, or a purple sweater and jean skirt with brown boots.  What do you think?


I might even do my nails a purple color.  Or is that too much purple?

I have no idea what Peter will wear, maybe jeans and a brown shirt?  


I love photography, and love having our portraits done, but oh, the stress it puts on me, since I am recovering perfectionist.  I want to get everything perfect and to live up to the vision I have in my head, of how I want the images to feel and turn out.  This time we are going to take our pictures at Railroad Square, an urban/funky/artsy part of town that should make for a really great background.  Can't wait!


If you need any help picking out a color theme for your portraits, I found this on pinterest and it seems pretty helpful.


Thursday, October 6, 2011

Fall 2011 Vegetable Garden


Last week, during the peak of that lovely cold snap we had, I planted my fall vegetable garden.  It felt so great to be outside, enjoying the beautiful weather and having my hands in the soil.  And I love gardening with Penelope.


Gardening is such a big part of me, I wish I had more time for it, or made more time for it.  I figure I have the rest of my life to grow plants, I will only have one window of opportunity to grow Penelope.

I usually do more plants, but I felt the urge to give my regular garden a rest.  It dawned on me, that I have been non-stop planting in it, since it was built and I decided it needed a little break.

Or maybe I just needed a little break. 

I planted broccoli and spinach.  This picture above is spinach, the very first picture is of broccoli.    

Penelope is a freak about broccoli!  She could eat a pound of it a day, and I swear it is because this spring she was so excited about watching them grow and harvesting them with me.

This little bed, used to be my herb garden.  It had gotten so overgrown and untidy looking, that it was driving me crazy.  So I pulled them all out earlier in the summer and it has been empty. 

I really liked planting in my herb garden, because it is so close to the porch.  While I planted, Penelope drew with chalk on everything, except her table with chalkboard paint.  

I had paint left over from when I painted the wall in my kitchen with chalkboard paint, and decided to paint her little table.  I am in love with chalkboard paint now and I wander around my house, looking for more things to paint!

Here is my 10x30 veggie garden.  I thought it would be a good idea to cover it, in order to kill some of the weeds.  The weeds are just getting worse and worse every year, I hope this at least puts a dent into my battle with weeds.  I am not sure what this stuff is called, its some eco-mesh-garden stuff that I got it Ace.  I am sucker for anything that says "green" or "eco-friendly", who knows if it actually works.  

In the past I have used pine straw and newspaper. Next spring, I would love to put a nice, thick, layer of mushroom compost down and restore the nutrients to the soil.

Did you do a fall garden?  How does your garden grow?


Posted by Picasa

Wednesday, October 5, 2011

What is Energy Healing?


I have wanted to write more in depth about energy healing for a long time now, but didn't really know where to start or how to articulate my thoughts. I still don't really know where I want to go with it, but I just really feel the need to write about it.  

This blog is a creative outlet for me and I want to write about what I am doing in the moment.  And lately, I have been going to lots of different energy healing and alternative therapy appointments, as I get over the stress of the last couple of months and try to restore my mind and body from the last three years of being pregnant and taking care of a baby, before possible baby number two comes.


I have also always been very nervous about telling people, that not only do I go see energy healers, I am an energy healer.  I guess after I told the world I ate my placenta, telling the world about my energy healing background didn't seem so crazy.  But I realize it does still sound crazy to a lot of people, or even like one of my best friends told me, oh so politely, that it was a little too far out of her comfort zone.


In the future, I would like branch out from my natural remedies posts, and write about anything and everything in the energy healing/alternative therapy world, including things like acupuncture, (which technically is a type of energy healing).

I want to share all the these I have learned over the last ten years of working with healers and the things I continue to learn.  Energy healing and alternative therapies have changed my life for the better and I would love for others to take see and feel the transformative effects it can have in your life.


Energy healing is crazy hard to explain.  But basically, everything is energy.  Your body, the trees, water, etc.  It is all made up of energy.  Each of us have a physical body and energetic body.  Some people call your energetic body,  your aura, but that is not entirely correct, I will go into more detail about that later.


The energetic body effects everything.  If there is a disturbance in your energy field, it will manifest in your mental, emotional, or physical body.  So to heal most anything, you need to heal the energetic body.   And if you only heal something on one level, the physical or emotional, but don't pay attention to the energetic level, it will come back into your life (possibility in different forms) until you deal with it, really deal with it.  

You don't have to do one or the other.  For example, if you are taking migraine medicine, or getting chemo, you would do it in conjunction with your alternative therapies, like energy healing.


In the case of a headache, energy healers deals with the pain of the headache, but also the real cause of the pain. And the real cause could be all sorts of things.  It could be residual angry energy left over from a fight with your husband, or could a symptom of something traumatic happening from your childhood, or even somebody attacking you energetically. I know it sounds crazy, but it's true.  People can actually, purposefully, hurt you energetically, so you have to protect yourself, again that is a post in itself, for later.


Reiki is one the most common type of energy healing.  It is an ancient form on hands on healing.  A person who does Reiki healing goes through trainings and attunements to create the healer within, to learn how to open their energy field to the Universal/God energy.  Then the healer acts as a vessel for the Universal/God energy to flow through them to the patient.


I am a Reiki Master. What that means, is that for over a year, I did trainings that built on one another. So first I was certified Reiki I Practioner, then a Reiki II and lastly I became a certified at the Master level. I have done energy healing off and on over the last 10 years, mostly with friends/massage clients who were open to it or really needed it, but I have never had a full on energy healing practice. Although, one day, I would love if I did.  My main motivation was to have this skill for myself and my family.


I started going to an energy healer when I was 18.  I went with intention of healing trauma from my childhood and teenage years.  Pretty much from 18 to 22, I was on a mission to get myself ready to be married and have a baby.  And for me, that meant doing a lot of hard work to heal old wounds.


Over the years I would go whenever anything came up tough in my life. I have also always gone to traditional talk therapy and done various alternative modalities (like chiropractic and massage).  I have always combined different therapies/modalities to keep everything in balance on a physical, emotional, and spiritual level.  Energy healing combines and enhances all other type of healing work.


If you would like the contact information of the women I have worked with over the past 10 years, please email me.  They all do phone sessions.


So what do you think?  That I am nuts?  :)
Have you ever been to an energy healer?  What kind did you go to?


Tuesday, October 4, 2011

Bean Bag Chair Cover Tutorial

I searched and searched online and could not really find a great bean bag tutorial.  The best I could find was this, and it helped me understand the concept of making a spherical shape, but I still didn't really like it.

So as usual, I just winged it and did whatever the hell I wanted to do, in the moment.    And it all turned out good enough for me!


As long as you don't look at the seams too close, they are super cute.  I figured they are going to get lots of wear and tear, so it didn't really matter if they are perfect.


Penelope loves them and that is the most important thing.  She loves to go in there and play with her little Calico Critter dolls.  I bought them on a whim, even though the box says 3 and up and has a million tiny pieces, and I am so glad I did.  These are probably her most played with toy right now.  She will sit for a long time and pretend all sorts of little scenarios, it is great.


They do require a lot of fabric, especially if you go the traditional bean bag/pouf route.  But I used sheets that I got a garage sale, and spent only a couple of dollars.  The one on the right is an old Ralph Lauren sheet and the one on the right is an old Pottery Barn duvet.

I bought this bean bag chair insert, from The Company Store.  In the video link above, they used cut up foam mattresses as filing.

Then I cut out my pieces.  If you go the traditional route, you need six pieces like this.  As long and wide as you need them.  I made a huge mistake and forgot to leave the bottom of the panel wider than the top.

Then cut your two circles in the diameter that you need. The wider at the bottom panel, is to be attached to the bigger circle, the smaller top, to the smaller circle.

This is the point I realized I had f-ed it up.  I did not make my panels wide enough, so it wouldn't fit.  So I had to switch to plan B.  I ended up opening up the bean bag, even though the tag, explicitly says DO NOT OPEN.  Like I said, I tend to do whatever the hell I want and so I opened it up.


Inside was small pieces of popcorn packaging.  So basically, I made a huge mess. It vacuumed up super easy though.


After I made the first one. I thought, Good God, there has got to be an easier way.  Then a little later, I was sitting on my couch with Penelope, looking at my dog's bed.   His bed, is basically a big round pillow with a panel between the top and bottom to give it some height.  So then I thought, what if I just did a big round pillow with no panel??


It took two seconds to make one this way!  It looks almost the same and took about 80% less time!

The one on the right, is with the panels, the one on the left is just a big round pillow.    All you do is cut two circles, any size you want (I used my round coffee table as a cutting template) and place them right sides facing. Then sew all around it, but leave a large opening to stuff it, then turn it inside out and stuff and sew closed.


I closed with a hand it stich and then went back over it with the machine to reinforce it.


Pretty cute right?  And a million times easier than a regular bean bag, right?  Have you ever made one?


Posted by Picasa

Monday, October 3, 2011

Baby Brezza Review and Giveaway

Earlier this summer, I was lucky enough to be sent a Baby Brezza One Step Baby Food Maker to review.  Since we did Baby Led Weaning with Penelope, I never got into making pureed baby food. Although, I did make one recipe, before I decided to let her try to eat pieces of whatever we were eating.


If I didn't do Baby Led Weaning, I would have absolutely made her food.  When you make your baby's food you can control ingredients.  You can make food with local, in season and organic vegetables. You can rest easy knowing that there is no BPA in the food from the plastic jars they come in at the store.  You can control price and save money by buying local vegetables that are in season, make a huge batch and freeze it (and we all know how I love to freeze food!).  And then you also get that high and that sense of pride, that comes when you create something with your own two hands.


Around the same time I was sent a copy of ICE POP JOY.  I highly recommend buying the ICE, POP, JOY book if you want to make healthy popsicles for your little one.  The author is an amazing woman, someone I really look up to and admire.  She has so many different and wonderful recipes to try and the photography is stunning.  I love having this book on my kitchen counter, because it is a JOY to look at!


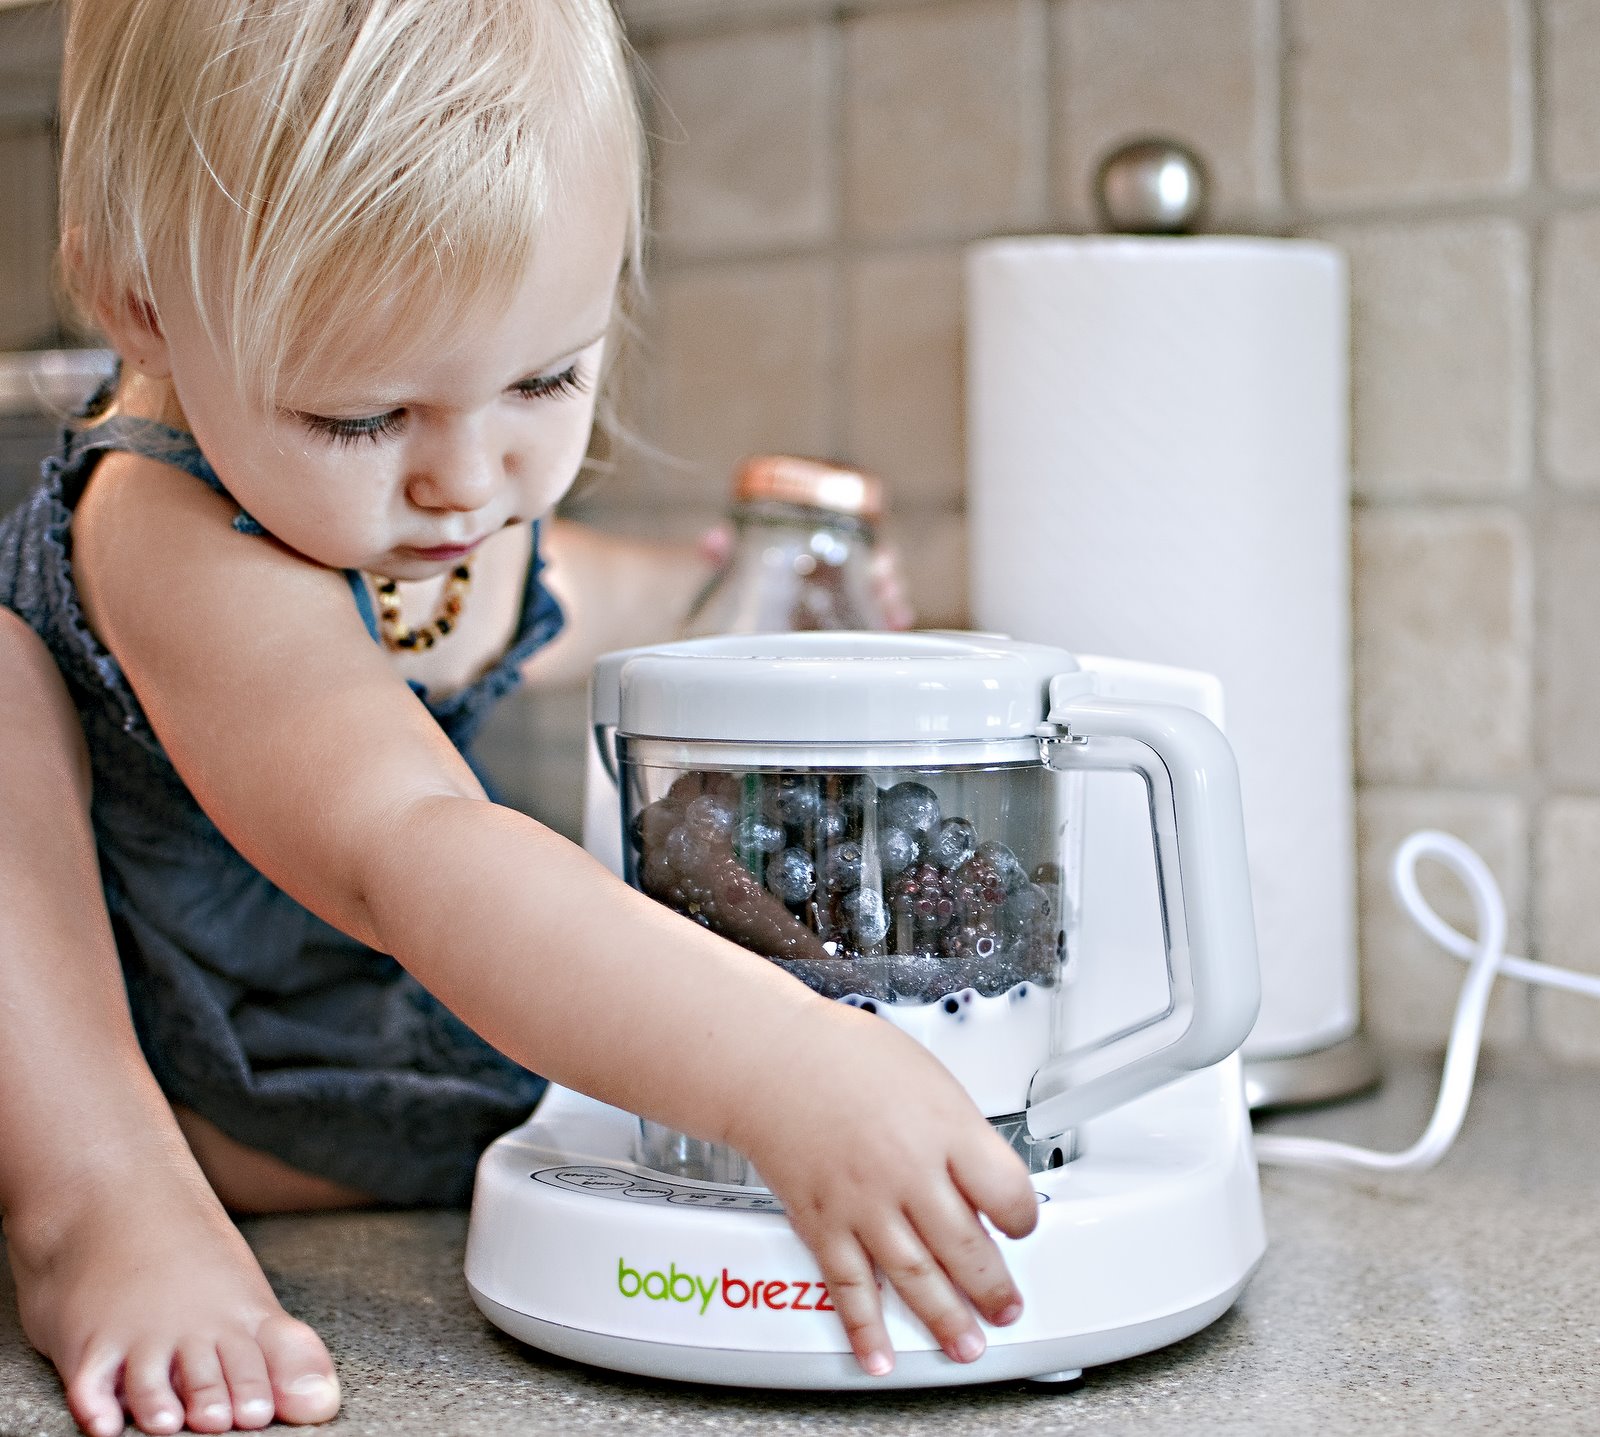
But I thought the Baby Brezza would be perfect for making popsicles, since it has a blend only option. I was so inspired by the book, that I decided to come up with my own recipe, with local, organic blueberries and blackberries.  It tastes amazing, but I can't share it with you yet, because it is going to be published in the upcoming Baby Food Cookbook that Baby Brezza is putting out next Fall!


Speaking of stunning photography, big thanks to Christy Baldwin Photography, for taking the pictures for this post.  She is pretty dang amazing!  I hope I can take pictures like her one day.

Penelope had such fun helping me make our popsicles.  And do you see how color coordinated we are?  I am such a dork, but I had to wear blue to match the popsicles!  That dress was actually the dress my maid of honor wore at my beach wedding, I liked it so much, I bought one for myself.

The Baby Brezza is an all in one.  So you can steam your veggies and then puree it, and only wash one item!

My little helper.

She really liked pressing the buttons.  I will have to be honest, figuring out how to use the Baby Brezza the first time I attempted to use it, it was not totally self explanatory.  I like to be able to whip things out the box and figure it out, without wasting time reading silly things like directions.  So take my advice, just take a moment to read the directions first!!  

And ta da!  Delish home made popsicles.  We used these popsicle molds from Ecological Babies.  I love them!

My beautiful girl loved her popsicles!  This is one of my most favorite pictures of Penelope.  Those eyes kill me!

If you don't have fancy popsicle molds, you can use an ice cube tray and tooth picks.

The Baby Brezza has a pourable spout, so pouring into containers was, wait for it, a breeze!


Do you make your baby's food?  Would you like to have your very own Baby Brezza?


Enter our giveaway!  Here's how:


MANDATORY ENTRY:


You must be a Mama and Baby Love Facebook Fan AND Baby Brezza to participate.


EXTRA ENTRIES:


Must include email address if not listed in profile. Each entry must be a separate comment in the comment section.


* Post about this Giveaway on Facebook and tag Mama and Baby Love (hit the @ and type Mama and Baby Love)


* Follow Me on Pinterest


* Sign up for the Mama and Baby Love email newsletter 

Good luck everyone! Giveaway will run until 10.30.11! I will use random.org generator to pick a winner and will email the winner and announce it here on the blog. The winner will have 48 hours to respond or a new winner will be announced.


DISCLAIMER: I was not paid for this post.  Thank you ICE, POP, JOY and Baby Brezza for allowing me to review your products and for the awesome giveaway. If you are interested in having me do a review and giveaway for your business or product, or about our advertising pricing, send us an email at mamaandbabylove@gmail.com


Posted by Picasa