Tuesday, January 17, 2012

How to Choose the Right Yarn and Crochet Hook

The next post in our Beginning Crochet Video Tutorials, begins at the VERY beginning, how to find the right yarn and crochet hook, thanks again Ayana!


I planned on posting the single crochet stitch next, but some readers posted an excellent question.  I realized when I read their questions that I hadn't started from the BEGINNING.  Like, what yarn to get
and the crochet hook that goes with it.


Choosing Yarn
The yarn that you get will depend on the project that you are working on. 

For example, if you are making a dishcloth, you should to use 100% cotton yarn (for its absorbancy and ease of wash).  I usually get the most inexpensive cotton yarn I can find, since the only thing that matters to me when I am making the dishcloths is that it is 100% cotton and cheap!  Some Walmart stores even sell this yarn on a really large spool. 


Of course, if you get a soft novelty cotton yarn, you will have really
nice dishcloths - that will get stained (from spaghetti sauce), and
faded (from constant washings).  You may end up annoyed that you wasted used your nice yarn making it.


If you have really nice, soft novelty yarn, I would recommend you use it for something that you will wear and want to last for a long time.  

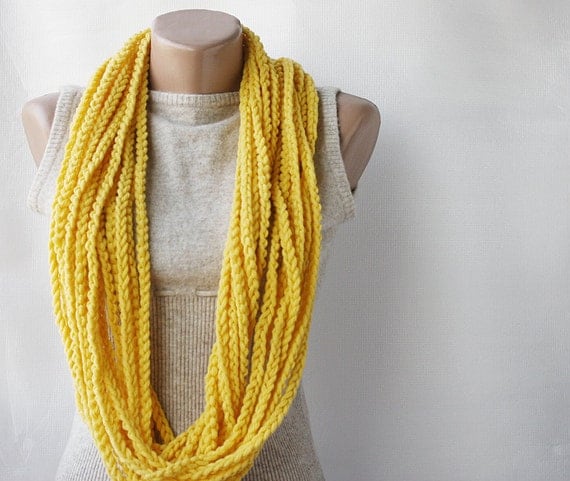
There is nothing like wearing a scarf made from some quality yarn! 

But if you are a cheapie (like me!) I recommend you use a really soft
acrylic yarn like Hobby Lobby's "I Love this Yarn" brand or Caron's
Simply Soft Yarn.  


I have NOT had a good experience with Red Heart's Super Saver.  It is tempting to buy because of the range of colors and the extremely low price.  But, crocheting with scratchy yarn is not a good time.  Besides, who will you give a scratchy sweater to?


Also, for a beginner, I would recommend you use a simple, plain yarn.  Don't get the kind that hides the stitches with fur or other embellishments, like the one below.


The amount of yarn you will need also depends on the project (duh).  I know you know that, but I needed an intro for this paragraph.  If you use a pattern, the creator will tell you about how much you need.  If you are making it up as you go along, it is a bit tricky.  For example, if I were making that scarf from the previous post,
I would probably buy 2 skeins of yarn.  


But if you want it really long and really thick - maybe you should buy 3 skeins.  The beauty of that scarf is you can't mess it up!  And with the leftover yarn, there are some really nice stash buster patterns.

Choosing a Crochet Hook
Most yarns have the recommended crochet hook size on the label.

1: recommended crochet hook size, 2: recommended knitting needle size,  3: amount of yarn on skein, 4: type of yarn, 5:washing instructions


Unless you are looking for a particular effect (when making amigurumi toys, for example, I use a much smaller hook than the recommended size), or trying to get the correct gauge (more on THAT later), you can just use the recommended size. 


Hooks also come in different materials: plastic, aluminum, bamboo, glass, silver, gold ... 


Yes.  There are some people who only use the best of the best.  Not
me.  I just use the aluminum.  I like how the yarn slides on it (and the
price!).


Do you want to go yarn shopping with me?  Yes?  Well, come on then!


I hope this helps you get started!  Let me know if you have more questions!


Ayana is a crafty mama of two who loves everything crafty and is kinda obsessed with thrifting.  She blogs over here and vlogs EVERYday over here.


Follow Me on Pinterest Or on Facebook!

Thursday, January 12, 2012

Lemon Water, First Trimester Tonic


I am very proud and excited to announce that I am a writer for the amazing new website Wholesome.


I will be doing about two posts a month about fertility and pregnancy.  


Here is my first post, about my happy experiment with Lemon Water.  It has become my go to cure all for first trimester yuckiness.  


Enjoy!


Follow Me on Pinterest Or on Facebook!

Wednesday, January 11, 2012

The Montessori Bedroom

I have a wonderful guest post today from Michelle Bachman of Jill of Trades about her toddler son's Montessori bedroom. Enjoy!

My name is Michelle Bachman and I am a Work at Home Mom with two boys Jason (3) and Andrew (1). I am currently working from home through a business my cousin and I started Jill of Trades, a personal and small business planning services boutique. 
I met Stephanie in 2007 when I was pregnant with my first son and taking prenatal yoga in her studio. That is when I began my discovery about the world of natural and attachment parenting and so I hold a special place in my heart for her.

I have truly fallen in love with Montessori's philosophy and attitudes towards young children. I have chosen Jason’s Montessori School that he will start in the New Year and have recently adapted our nursery into a Montessori bedroom. 
One of the most intriguing ideas about the Montessori bedroom in particular, is the use of a floor bed rather than a crib. The idea is that a low mattress on the floor provides the child with a better view of his room and surroundings and more freedom to move about, which in turn makes for a calmer and happier child. 

It is of course important that the entire room be completely safe for the child to crawl around in, essentially turning it into a giant playpen for him. 

Below is a peak at my transformation of the nursery into a Montessori bedroom. I removed the crib (radical I know!) and replaced it with a mattress low to the floor.


I also removed the standard changing table/dresser combo and replaced it with a small dresser out of the way hidden in the closet.  The last big change was simply turning a shelf that was tall and out of his reach on its side so that it was also easily accessible to him. Having the art work and accent lighting low and visible to him is brilliant.  

We are a few months into the transformation and LOVE it! We have a sort of make shift co-sleeping arrangement in the evening: When he wakes in the night I lay in his bed and nurse him and if he falls asleep first I can slip away to my bed and am not sore from being contorted all night. 

Sometimes I just grab him and bring him to my bed still because I know how fast he will grow up. The most amazing note is that for the first time he isn’t falling asleep on the breast 100% of the time. I lay and nurse him and when he is done I get to watch him sleep train himself (Uhmazing!). Tossing and turning. Rolling around. Cooing at me. Tracing my face with his little fingers and his eyes closed.  He still falls asleep on the breast but maybe a dozen times now he has successfully put himself to sleep after and has tried dozens more.


There is still more I would like to do to Andrew’s room. The Montessori Foundation has some great information on designing a Montessori home. Our playroom has adopted some principles but is a work in progress. Jason’s room is next on my list.

“Never do for a child what he can successfully fail at doing himself” –Maria Montessori

Thanks for having me Stephanie!

XOXO
Michelle


Thanks Michelle!  It looks awesome!  We now have a mattress on the floor in Penelope's room and it has also worked very well for us, thanks again for sharing and inspiring!


What do you guys think?  Mattress on the floor crazy or genius?

Follow Me on Pinterest Or on Facebook!

Thursday, January 5, 2012

Beginner Crochet Tutorial: The Chain Stich

I am so excited about this guest post Ayana over from her blog AyanaREd.  She has lots of great stuff, so be sure to check her out.


A friend of mine taught me how to knit last year, and it was highly addicting and fun for about a week, then I got pissed off from all my mistakes, packed it away and never touched it again.


I hear crocheting is supposed to be easier.  I wanted to learn how and see if that is true. Ayana just happens to be a crocheting expert and she is going to help me learn.  This will be a series of guest posts that builds on one another, did I mention I am excited?!


So here is Miss Ayana...and best of all her tutorial is a video!!  I told her that I am bit dyslexic when it comes to directions and that I am visual learner, and so she whipped up this video for me.  Thanks so much Ayana!

The Chain Stitch, so simple.

I saw this scarf, this scarf, and this scarf on Etsy and I thought they were super cute.  (What?  You don't look on Etsy for some DIY inspiration, too?).  


Anyway, what struck me about these scarves was the fact that they were nothing but a bunch of CHAINS!  Yes.  The super, simplest crochet stitch of them all... I don't even know if it is considered a stitch.

Generally, it is used as a foundation.  Most all crochet projects start out with some chains.  If you see it in a pattern it will be abbreviated to just ch.  For example if you see ch 8, this means that you should make 8 chains.

Let me show you how to do it:  


Easy, huh?  Let me know if you have any questions!


Thanks again, Ayana.  I am so excited for the rest of this series and to learn how to make that beautiful scarf!


Follow Me on Pinterest Or on Facebook!

Tuesday, January 3, 2012

New Year, New Way To Do Resolutions

Woah, this feels kind of weird to be doing a post!  Thanks so much for standing by while I took my little break.  


I had intended for my break to be spent being productive and catching up on other projects. Bwhahahaha.


Then I found out I was pregnant!  And then, shit hit the fan and I thought for sure I was going to miscarry.  Thankfully, I was put on bedrest and that combined with some other alternative healing and lots and lots of prayer from my awesome readers, and I am still pregnant!  Thanks again to everyone who held the space for me and prayed.


So I have gotten nothing done other than grow a baby, which of course is all I care about, but I feel bad for promising guest posts while I was gone and I didn't even have the energy to get them up!  They will be posted in the coming weeks and I will try my best to at least get one post up a week from me.  Thanks for your patience and sticking with me!


Anyways, onward and upward....


New Year's Resolutions.  


I love them.  I usually spend hours upon hours thinking about my goals and dreams for the new year and then I meticulously craft them in written form.  I hang them up where I can see them often.  This year I put them in my craft nook, next to my vision boards.


In year's past, I have done massive lists.  Listing every possible thing I could improve upon or wanted to accomplish.  


Later, I toned it down, and stuck to only a few and really made a big effort to stick to them and integrate them into my life/personality/what have you.


This year, I thought I would try something new.  My OCD brain is constantly looking for order and ways to  organize everything, even my thoughts.


I thought this year I would stick to one resolution, but in five different categories: financial health, physical health, mental health, emotional health and spiritual health.


So without further adieu here are my 2012 resolutions, in my new orderly fashion.  I made a pdf of what I made up, so if you would like to print it and use it, it is all yours!  


Financial Health:  Stick to a budget.  Like for real.  Like really, really.  My husband and I have always been good at making a budget and sorta staying within the parameters, but we are both really good at "but, we REALLY NEED this tactics."  Not this year.  This year it is on like donkey kong.  We want to save up money to buy land to eventually build our dream, eco-friendly house.  We are not messing around anymore.


Physical Health:  Wear Sunscreen.  Every friggin day.  I have lost over 80 pounds in the last 2 years and one down side of all that weight loss is wrinkles.  I have some crow's feet that are no joke.  I am a Florida girl born and raised and that junk is starting to show.  


Spiritual Health:  Go to church every Sunday.  I don't think that skipping church is a sin, like most Catholics, but I do think it is easier to be the person you want to be, if you are doing something on a regular basis to connect to Spirit.  I love going to mass.  I love the ritual and pageantry.  My OCD loves the routine and order, but still it is hard for me to make it.  When Penelope was born it was either nap time or pump time and then later, when scheduling worked out better, she was beyond the quiet babe-in-arms stage and I was not ready to put her in the nursery.  And my husband does not want to go, so he would always tempt me with brunch or hikes or trips to the beach.  Since he works so much, I always wanted to spend family time together when we could.  But he and I talked and I asked for his support and told him this is really important to me, and he agreed to help out.


Emotional Health: Forgive people that have hurt me, especially in the last year.  Holding onto my anger and hurts only hurts me.  The last six months have been a very transformative time in my life.  I had huge shifts between the age 18-20, so maybe they come in 10 year cycles?  Anyway, I have done a lot of work in the area of forgiveness lately, but I want to do more, I want to clear it all.  I want all the hurts surrounding my heart, gone, peeled away, so I am always able to connect to my heart and feel joy.


Mental Health:  Related to my emotional health, I want to take more time before I communicate with people, whether it be friends or family, or readers here on my blog, to make sure I am connected to my heart and clear about if I am coming from whole place or a wounded place.  This is a skill I have honed writing this blog, making sure each post that gets published is clear and from my heart, but I would like to extend it into every single conversation I have.  I want to be more responsive and less reactive.


So there are mine!  What are yours?


Follow Me on Pinterest Or on Facebook!

Friday, December 9, 2011

Back in a Bit

Hello, my lovely readers.  I hope you are all having a wonderful holiday season so far!


I am going to take a couple weeks off from blogging here so I can take something off my plate and enjoy the holidays more.  


I also want to spend some time on other computer/writing projects that always seem to get put on the back burner. 


And really enjoyed my week off for Thanksgiving.  I was able to read 5 different books (yes, I read fast and one of them was short) that week!  It made me remember what I used to do before I spent all my free time writing...it was reading!


I have some fabulous guest posts lined up and I will probably refurbish some of my old posts since the majority of you all are new!  If you would like to guest post here, please email me at mamaandbabylove@gmail.com


And I will stay active on Facebook and Pinterest throughout the holidays, because they are such a joy for me to be apart of.


I will back with fresh and new content the week of January 9th. 


I wish you all lots of love and light and Happy Holidays to you all! 


Follow Me on Pinterest Or on Facebook!

Thursday, December 8, 2011

Easy DIY Christmas Decoration Ideas

It is a Pinterest kind of Christmas around here.  I mean really, do you even remember what the world was like before Pinterest?  


Last year, I gave away an entire bin of decorations, in an effort to just have less stuff.  We live in a house with over 2000 sq feet and in a matter of 7 years, we have filled every inch and corner with stuff.  


It all started last July, when I started packing, when we were about to move to Chile.  I just gave away everything I had packed up, because I realized I didn't even need it or miss it!  I have been slowing clearing out stuff, ever since.


So this year, I reduced down again, and gave another two boxes of Christmas stuff away.  I only kept the stuff I really, really loved or that was a family heirloom.  Has anyone else gotten rid of Christmas decorations this year to simply life and have less stuff?


Of course, I also wanted to make room for a few new pieces, but overall I still have way less stuff in the house.


Ok, so the felt Christmas tree.  Took all of 20 minutes.  Cut out a big ole tree, mine is about 3 feet tall.  I got the green felt for a couple of dollars in the remnant bin at Joann's last Christmas.  I had enough to make two trees and gave one to my friend.  Miss P is not the biggest fan of it yet, but I really like it.  She likes to make Mickey Mouse's out of the ornaments.  I just did circles for the ornaments (I used some of my gorg bamboo felt) but if you get really inspired you could make fancy ones like these.

As I was cleaning out all of my decorations, I realized I had 9 boxes of red glass ornaments in one bin.  I slightly remember buying them, thinking, they are so cheap!  I could do a ton of different projects with them!  And never did.  Because there was no Pinterest back then to light a fire under my arse.  


I finally put them to use and made a wreath.  I used this tutorial, it called for more balls (hee, hee that's what she said), but I was not about to run to Micheal's just to get one more box, of balls, so I made due.   You can see that mine could have used a couple of more (can I get away with another that's what she said joke here?) to make it more full, but whatever. 

I saw this idea from the one and only Martha.  I used all of Penelope's old Christmas socks and went out and bought the rest.  You can get Christmas socks at Target for $1.  I hung it up in front of her play room.  It is not exactly functional this year, because I didn't put anything in them.  But baby steps!  I was thrilled just to get it done!


I put stickers on the socks instead of embroidering on them.  Less time and if for some reason I want to use them or repurpose them, I can just rip the stickers off.


See that little red and white stripe one with the green ball on the heel?  I bought those for Penelope her first Christmas.  Her feet were so small then!  Sigh.  


Yes, here is Miss P, at 4 weeks, in jeans.  There was no lounging around in plain onesies for her.


I also made Christmas trees with lights for the front porch.  I had both the tomato wire and the garland already.   I couldn't get a good picture of mine, but you can sort of see them in the background here.


I was also inspired by my Candy Cane board and instead of putting cranberries into my glass vases like I normally do, I put candy canes inside. I also wrapped red ribbon (that I had on hand) around the big white columns on my front porch and made them look like candy canes.


And lastly, I changed up my shelf/mantel from last year and did a couple string of lights instead of pine tree branches.   


So there you have it!  Do you have any easy, cost-effective holiday decorating ideas to share?  


Follow Me on PinterestOr on Facebook!
Posted by Picasa